Nick Kallen has launched Plasticity 1.3, a new version based on NURBS modeling tools that enhances the surface design workflow and introduces many new features. Plasticity is a complex software based on NURBS modeling that has been developed for over two years. The software was initially launched in April, showcasing cutting-edge modeling tools, user-friendly interface, and key binding reminiscent of Blender. The latest stable version, Plasticity 1.2, was launched in July. In its new version, Plasticity has introduced the Blender Bridge plugin, which enables real-time linking between two applications. This integration allows users to preview plastic models in Blender and provide accurate materials and lighting. Notable updates include the addition of chord fillet support, a new radial menu system for effective access to basic settings, and the introduction of object solos in the scene.
Blender Bridge plugin

Blender Bridge插件
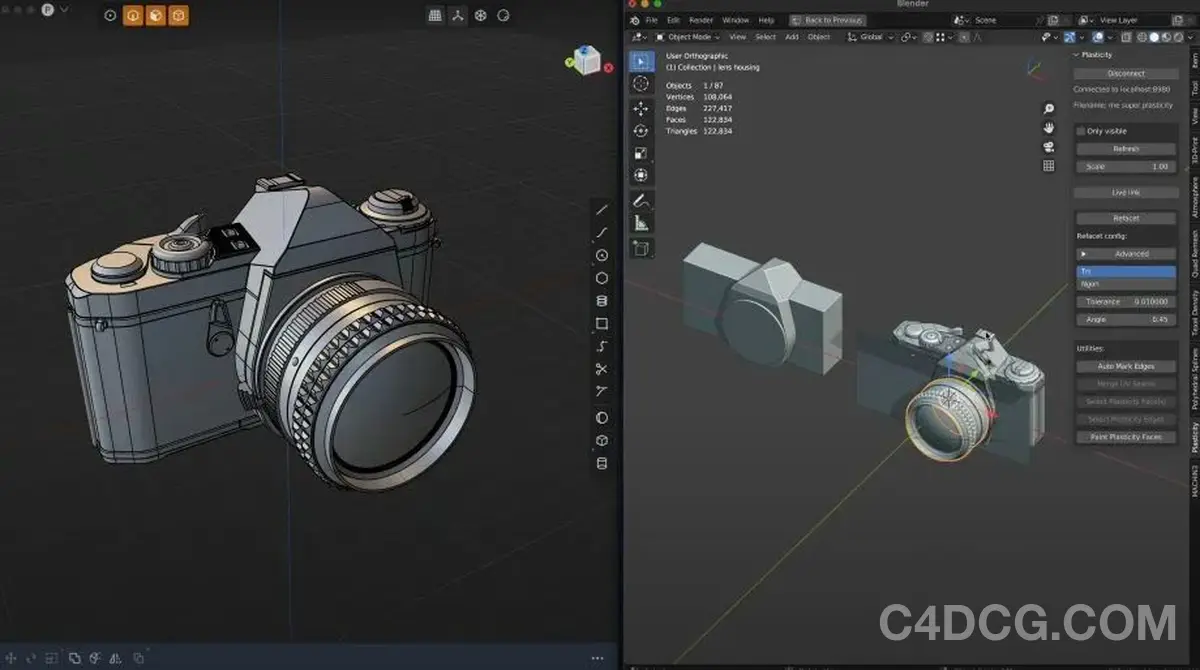
Version 1.3 introduces a new Blender Bridge plugin that can connect two applications in real-time and quickly transfer grid data from Plasticity to Blender (with just a click on refresh to quickly load data without exporting or adjusting settings).
Even if the user makes modifications to the geometry in Plasticity, the materials set in Blender are retained, and the group structure becomes a collection in Blender, allowing multiple documents to be merged into one Blender document.
The strength of Blender Bridge lies in its ability to quickly import assets, and users can use materials, lighting, and other functions in Blender to set up and render scenes.
Most Plasticity face count tools can continue to be used in Blender, even if the Plasticity document is placed in Blender, users can continue to adjust the face count settings of the Plasticity model. In addition, Blender Bridge also has functions such as automatically marking edges, selecting geometry corresponding to Plasticity faces, and merging UV seams.
Customizable shortcut menu

可自定义的快捷菜单
The new version provides 2 pop-up menus by default, which can be used to quickly execute commands through shortcut keys.
[Selection Mode Shortcut Menu]: Used to switch between selection modes
Viewport Settings Shortcut Menu: Used to modify 3D viewport settings
Users can customize or recreate shortcut menus, while integrating all commands within Plasticity.
Layered isolation

分层隔离
Enhanced “isolation command” function, the new version can layer and hide objects, greatly optimizing workflow in complex scenes. After using the isolation command, you can further select objects within the zoomed out object group and run the isolation command again, keeping only the most recently selected objects visible.
This feature can be reused multiple times, and the current isolation level will be displayed on the screen. Clicking on it can gradually restore the display of more hidden objects.
Multiple windows+copy/paste+assembly commands
Users can copy and paste objects between different windows, and enhanced commands such as “Copy to Positioning” and “Paste to Positioning” have been added (similar to positioning commands, but can be operated between different windows), which is particularly convenient for model assembly.
Multiple Enhancements to Outliner
- You can access various related commands by right-clicking on the group folder.
- Provides a shortcut to locate the object selected by the user in the 3D viewport in the outline.
- Isolation selection: You can collapse all groups and parts, leaving only the parts that contain the user’s selected objects.
- Users can make bulk state changes (such as hiding, disabling, locking), rename, or modify materials by selecting multiple objects.
Alt+click on the group folder to select all objects in that section. - Right click on a section label and select ‘Select All’ to select all objects within that section.
Chord tangent circle

弦切圆
Added the chord tangent circle option to the solid fillet function. Regardless of the angle of the fillet, the arc length of the tangent circle can remain constant, especially when pursuing visual consistency across different parts of the model.
Edge motion enhancement
When using the ‘Move Command’ to move edges, you can use the move controller. In addition, the new version can also specify benchmarks and move freely.
When using the ‘Move Command’ to move edges, you can use the move controller. In addition, the new version can also specify benchmarks and move freely.


